What your Provider Doesn’t Tell You: Heating Oil Vs Propane

If you’re a resident of the Northeast, you probably don’t have a lot of options when it comes to heating your home. If you’re one of the few people that has Natural Gas, consider yourself one of the lucky ones. It is an extremely cost-effective way to heat your home. But, it is unfortunately not available everywhere and gas conversion is going to be expensive.

Usually, electric heat and heat pumps will work well for small condos, apartments and places that have regularly mild winters. As for the rest of us, we only have two choices. Those being either Heating Oil or Propane.

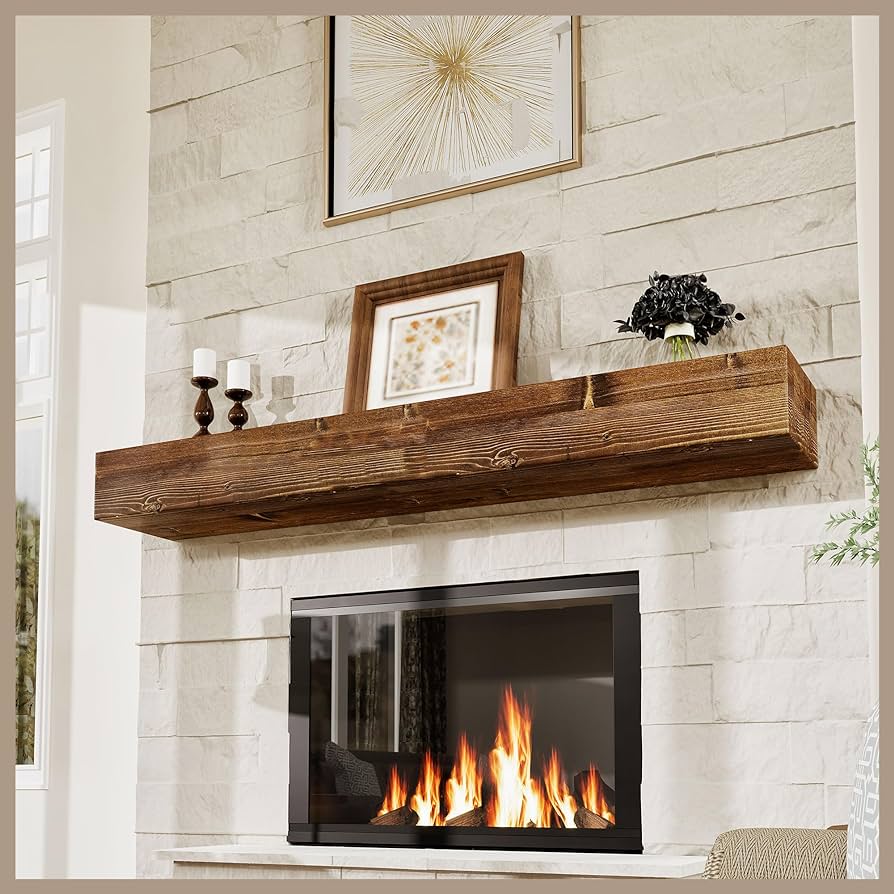
Propane is growing in popularity, and you can use it for many things such as gas fireplaces, pool heaters, gas stoves and much more! Due to this, it’s not actually uncommon to have both heating oil and propane in the same house. I’ve spoken to people who use both and both combined can be very effective when it comes to heating your home. But, I’ll be going in depth on both to make sure you understand everything you need to know!

You can use Propane for many different utilities around your home! Such as fireplaces, stove tops and generators.

When Should You Switch Between Heating Oil and Propane?

If your home needs a new furnace or boiler, then this is around the time you should consider switching. Usually the system itself (either heating oil or propane) tends to be the most expensive component in the system change. Due to this, this is a good time to consider changing over to a new fuel. Some important factors that you should consider are listed below:

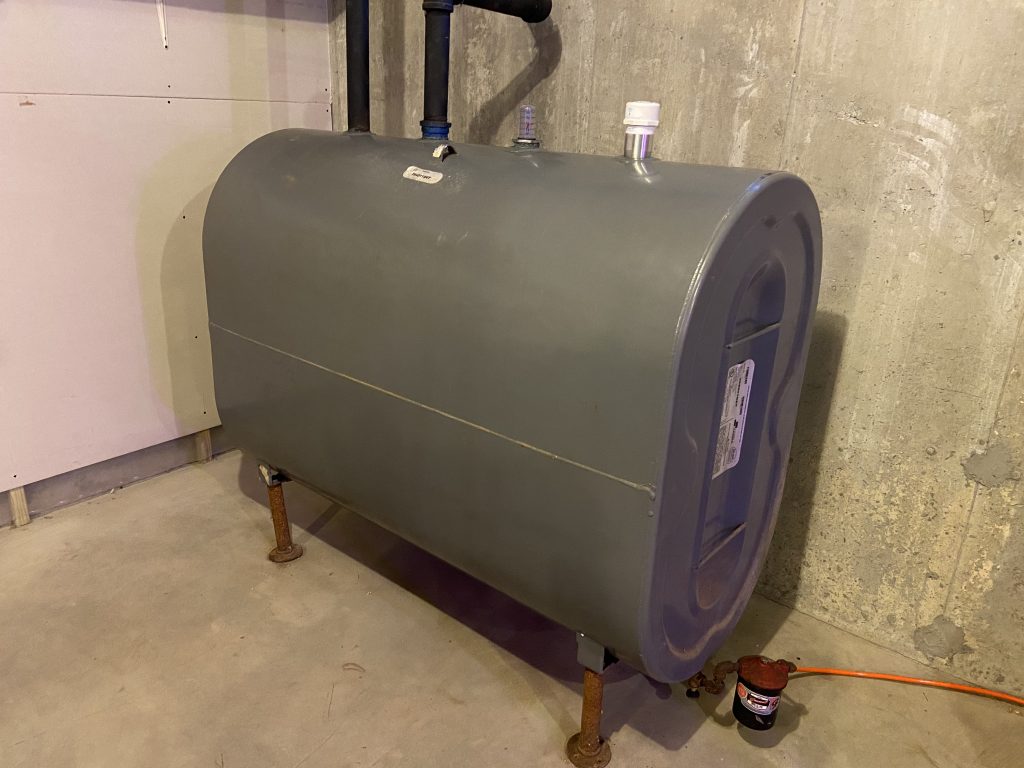
The Tank: This is the most important part of your system. You should know where it will be place and weather or not you or your provider will own it.

BTUs and Efficiency: While propane is normally considered to be more efficient, oil actually produces more heat per gallon compared to propane.

Freedom to Shop Around: Make sure that you have the ability to choose between suppliers. The last thing you want is to run out of oil and not be able to order any if you run out!

Differences Between Heating Oil and Propane Tanks

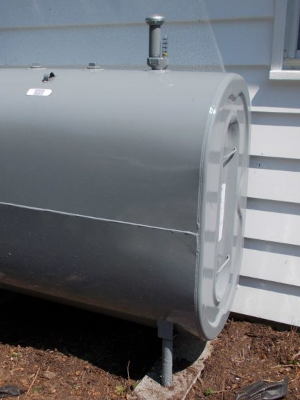
This might sounds surprising, but this is can be a deciding factor for a lot of folks who want to upgrade to a new system, or make the switch. A good oil tank will typically last around 30+ years if you maintain it properly. If yours is only a couple of years old, then you don’t need to worry about switching! You still have a lot of time!

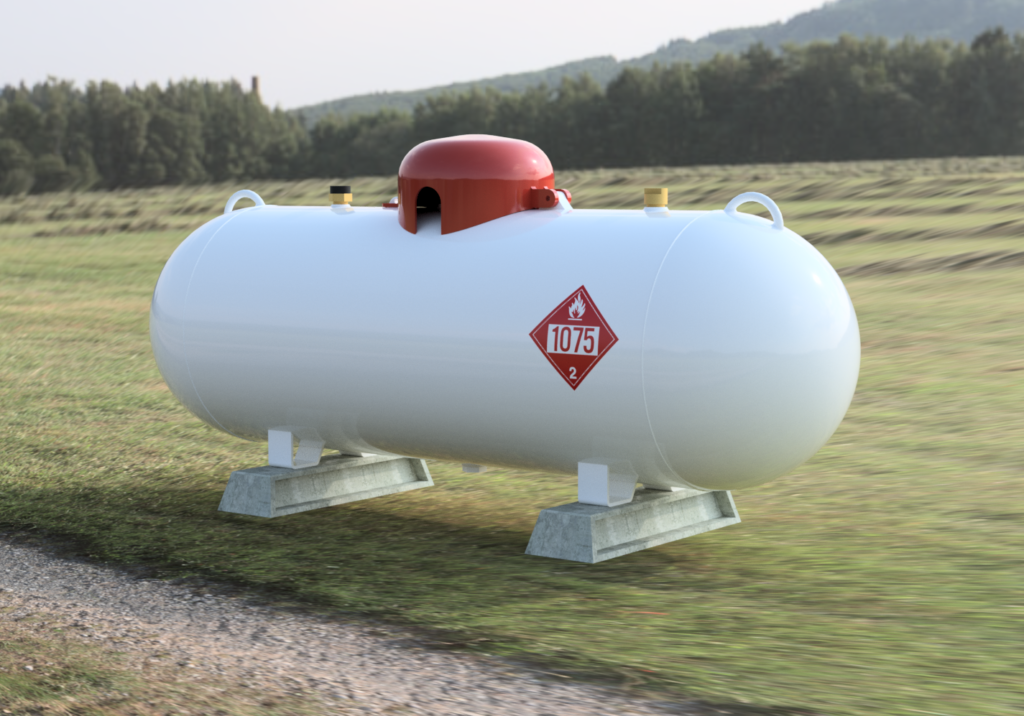
However, propane tanks are really only supplied by provider, unless you buy the tank outright. Depending on the size of the propane tank, it can cost upwards of $5,000! Meanwhile, heating oil tanks will normally cost you a couple hundred dollars if you’re getting a standard 275 gallon tank.

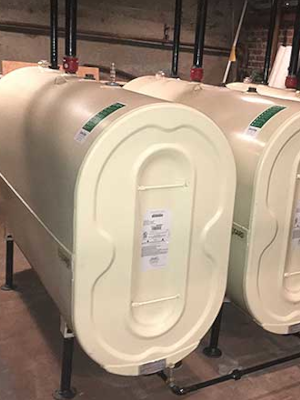
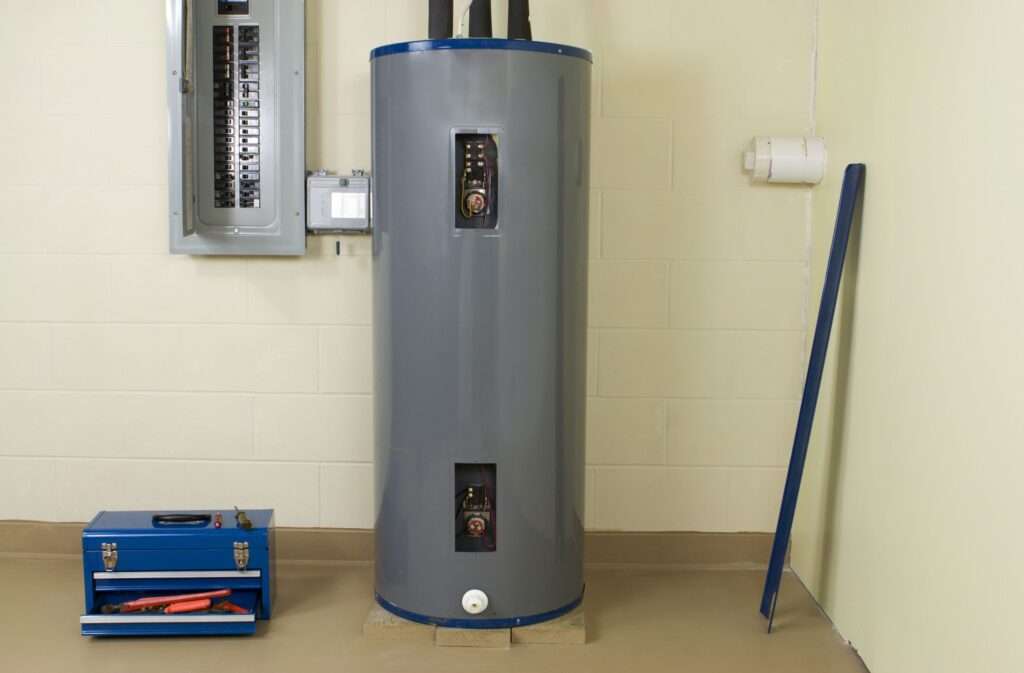
There’s also the visual appeal of these tanks. Propane tanks are usually a lot harder to hide compared to heating oil tanks. You can store heating oil tanks indoors in either a garage or basement. Meanwhile, a propane tank usually looks like a big white pill that you will need to store outside a little bit away from the house. However, you can install them underground to keep them out of view.

This is typically what a propane tank will look like outside. Usually in the middle of your yard or off to the side, but they look unappealing to look at in your yard.
Most heating oil tanks will look like this and can be commonly found in your basement or garage! As the homeowner, you’ll always own the tank which will allow you to order from whichever dealer you’d like!

Tank Ownership is Very Important

One of the most overlooked factors of the heating oil systems is who actually owns the tank. Usually, when a company tries to get you to switch to propane from heating oil, they’ll tell you that they provide their own tanks. They’ll usually tell you that this will save you money because you won’t need to buy a tank.

But that couldn’t be farther from the truth. While yes, getting your tank through the provider will save you money at the start, it locks you in to ONLY buying from them! This will eliminate any freedom or control that you would normally have over your tank. You even won’t be able order from another dealer because it some states, it’s ILLEGAL to have a supplier fill up a tank from another supplier. The only way to switch from propane providers is to have the tanks removed and have another company install their own, or buy your own.

But, if you have a heating oil tank, then you’re in luck because you always own your tank! Regardless of where it’s installed and where you order from, you will always own your tank! This will be able to give you maximum flexibility and keep you out of an expensive problem.

An important take away from this is that you should make sure that you own your tank to avoid being stuck with only one company.

BTUs and Efficiency

Some folks will usually look at price per gallon to determine if propane is less expensive than heating oil. While this is normal and usually what you should do, you’re actually overlooking two major factors. These would be the Efficiency and BTUs (British Thermal Unit). BTUs will normally represent how much heat a gallon of your desired fuel will produce. Heating Oil is known to produce ALOT of BTUs per gallon. One gallon of heating oil can easily produce 138,500 BTUs, while a gallon of propane can only produce up to 91,500 BTUs. You also shouldn’t forget about the efficiency of your burner. Modern day furnaces are usually 95% more when efficient compared to older furnaces. This also means that 95% of every gallon of propane is going to be converted to heat. However, most oil burners are only about 80%-90% efficient. In the below calculation, we’ll use 85% of our efficiency as an example:

Propane: 91,500 * 0.85 = 82,875 effective BTUs per gallon

Heating Oil: 138,500 * 0.85 = 117,725 effective BTUs per gallon

For a side by side comparison, we should take a look at how many gallons of propane will be required to produce the same amount of heat as one gallon of heating oil. Heating Oil will naturally produce 117,725 BTUs with one gallon compared to propane’s 86,925 per gallon. For propane to generate the same amount of heat as heating oil, you’ll need to use the following equation:

117,725 / 86,925 = 1.35 gallons

You can do an easy price comparison by taking the price per gallon of propane and multiply it by 1.35 to see how it matches up to the price per gallon for heating.

The Freedom to Order from Whoever You’d Like

Usually with heating oil, you’ll have multiple suppliers to buy from. Signing up for automatic delivery and paying the premium price is always an option as well. But using call-by services such as FuelSnap is always preferred. Buying oil whenever you need it is will save you more money in the long term. Especially if you explore dealers and shop around on deliveries to find which dealers you like to order with!

Now with propane, it is INCREDIBLY difficult to to compare prices, because nearly 95% of propane tanks in the northeast are owned by their providers. Unless you’re within the 5% of homeowners that own their tank, you won’t be doing much shopping around. You’ll be stuck with the fixed pricings that your dealers will normally provide you.

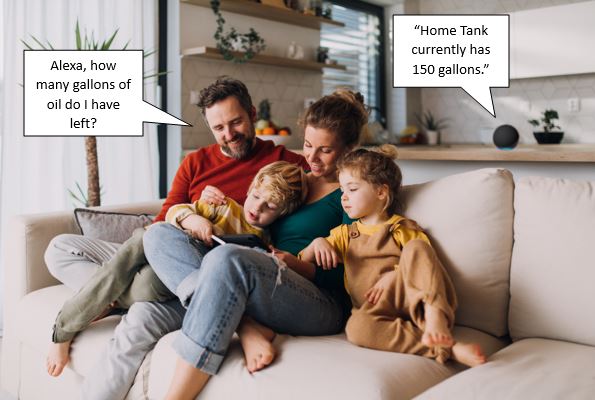
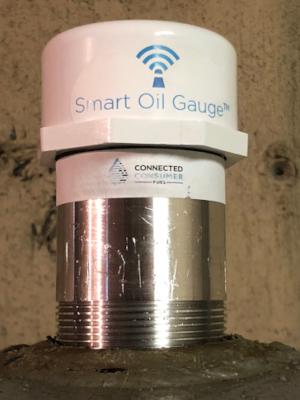
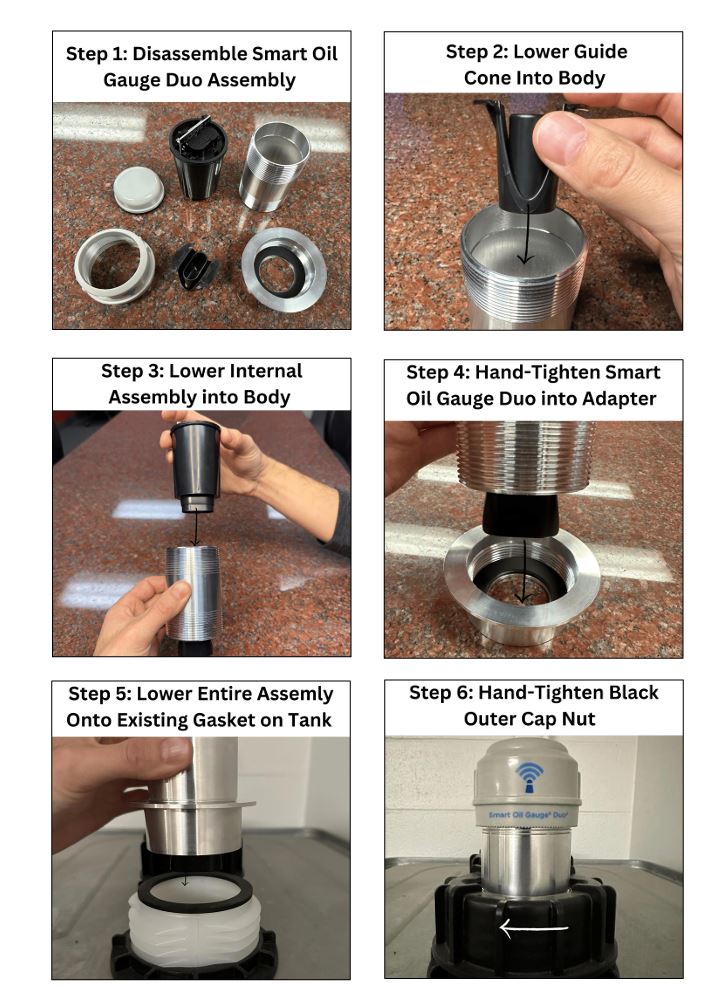
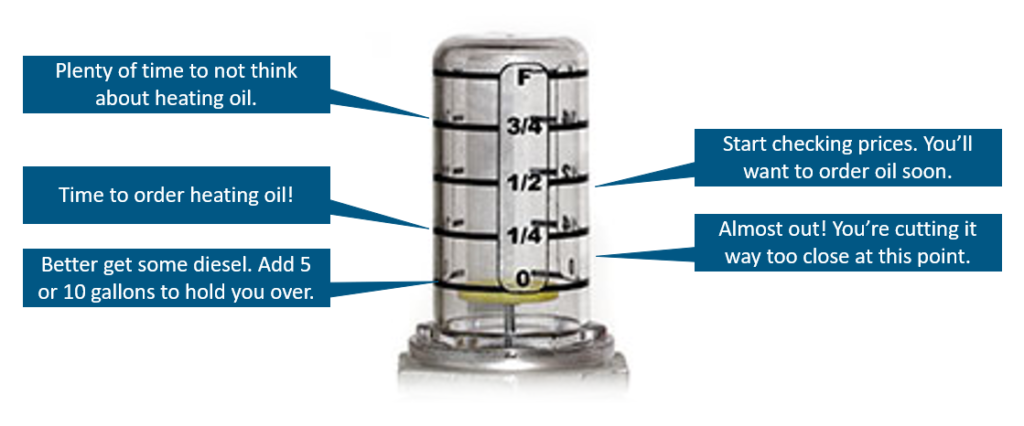
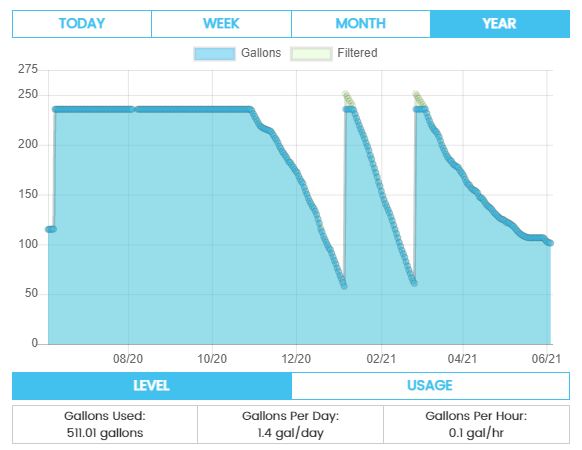
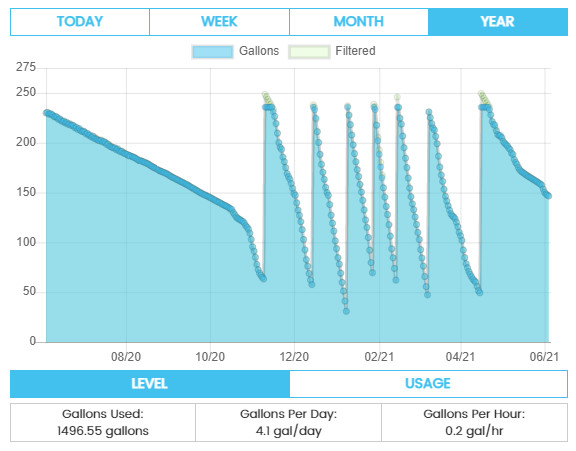
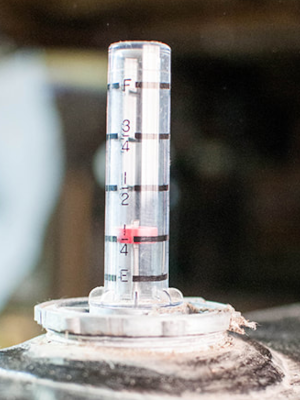
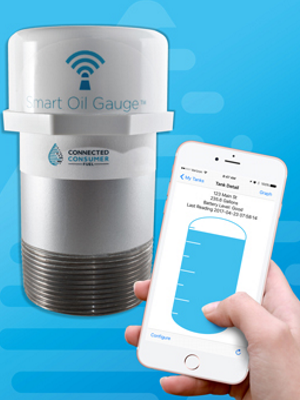
With heating oil, the market is much more competitive. Therefore, prices will tend to be a bit more varied. This is because dealers are constantly in competition with each other and will thus try to charge the lowest price per gallon possible. You can also get something like a Smart Oil Gauge to check your oil level from the app on your phone. When your tank runs low, the gauge will alert you and you can order oil and have it delivered usually the same day! You can simply order from the app without calling anyone! You own your tank, so you’re in control on who you do and don’t order from!

Ordering on FuelSnap will look something like this. You can check here frequently to keep up with current prices and order when prices are low!

So What’s the Bottom Line?

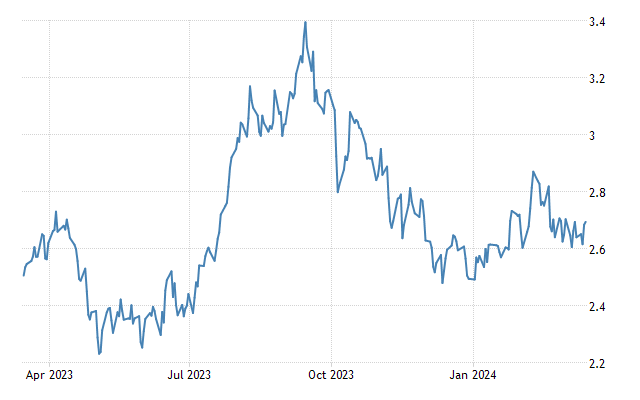
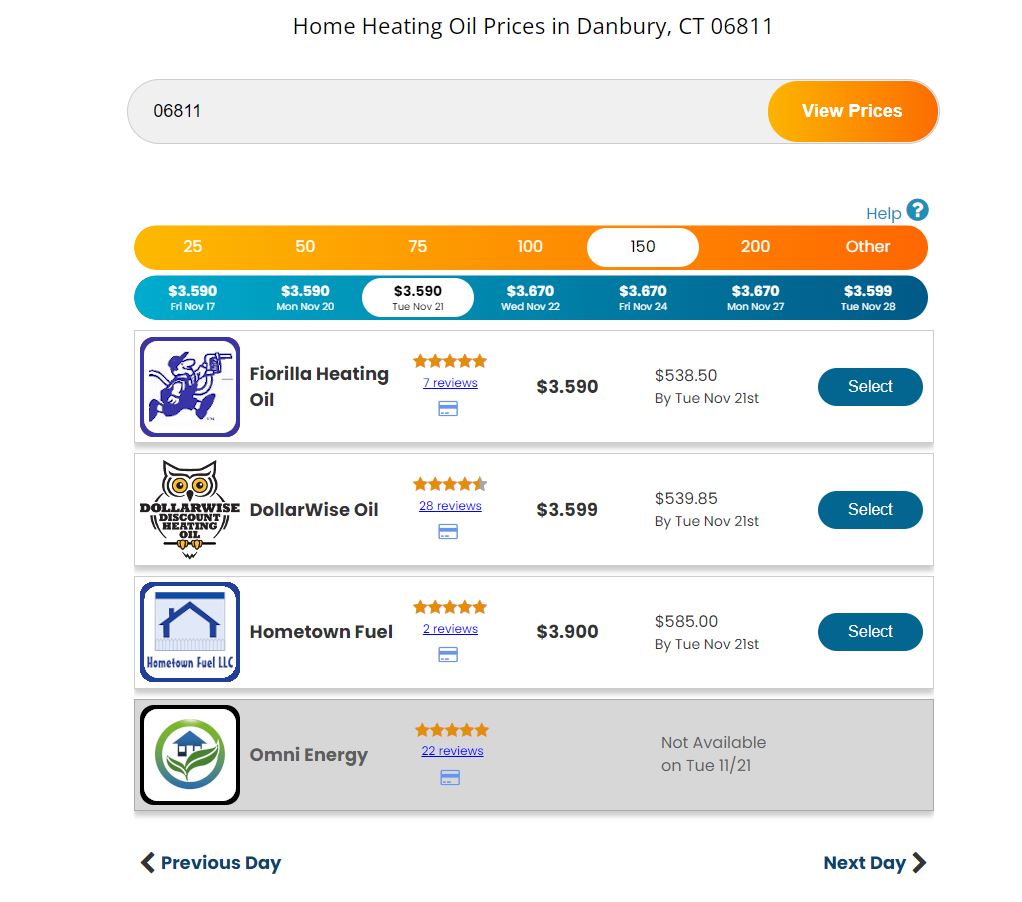
At the time of writing, heating oil prices are going down but are currently ranging from $3.26 – $3.70 per gallon on our FuelSnap website. While propane is around $3.87 – $3.90 per gallon according to the EIA. Since you normally need around 1.35 gallons of propane to get the same amount of heat out of one gallon compared to heating oil, the math will tend to be pretty easy when calculating this. This will obviously change over time as we get further into the summer season and prices will see a slow and steady decline.

With this in mind, be careful when your HVAC provider tries to sell you on the benefits of propane. In most cases, they’ll inform you about the benefits because it’s really in their interest. They will usually provide you tanks and you’ll be unable to shop around if you commit to propane. There is very little competition for propane providers, which will allow them to charge whatever they want.

However, there are hundreds of heating oil dealers that are competing for your business on the daily. You’ll be able to compare pricings use sites like FuelSnap and order when ever you need to! Oil will create more heat per gallon compared to propane and will often be delivered same or next day.

But this doesn’t mean that you can’t have both! You’ll save a significant amount of money by using both! They really are a great combination that is very beneficial to use with propane being used for fireplaces, stove tops and generators, while heating oil can be used to heat your home and water! At the end of the day, getting the best of both worlds is too good to turn down!

Happy Heating,

Hunter

Amazon Alexa Compatibility with Your Smart Oil Gauge

If you have have a Smart Oil Gauge, chances are that you have more smart devices. For all the amazon fans that use our gauge, you’re in luck! The Smart Oil Gauge is compatible with the Amazon Alexa family of devices. There’s a skill that we have that allows Alexa to connect to your Smart Oil Gauge account! You’ll be able to ask her various questions about your oil level!

As shown above, the Amazon Echo Dot is one of the many Alexa devices to choose from that can communicate to your Smart Oil Gauge device.

How to Link Alexa to your Smart Oil Gauge Account

The process of connecting your Smart Oil Gauge account with your amazon account is very easy to do.

  1. Open up the Alexa App
  2. On the bottom right, click More and select Skills and Games
  3. Search for the Smart Oil Gauge skill by pressing the magnifying glass icon on the top right.
  4. Download the Smart Oil Gauge Skill
  5. Login to your Smart Oil Gauge account after downloading the skill

Once you’ve downloaded the skill and logged into your account, your amazon and Smart Oil Gauge accounts will be linked! Once they’ve been linked you’ll be able to start asking Alexa all kinds of questions!

What Should You Ask Alexa?

To ensure that Alexa knows you’re talking about the Smart Oil Gauge, you should start off by saying “Alexa, talk to Smart Oil Gauge”. This will prompt the Smart Oil Gauge feature to respond. You’ll be able to ask a variety of different questions regarding usage, current level and much more!

Here are some examples of questions that you can ask Alexa using the Smart Oil Gauge skill:

Alexa, how much oil is currently in my tank?

“When will I need to order more oil?”

“How many days until I run out of oil?”

Asking Alexa these questions will give you a rough timeframe of how many days until you need to order oil! You’ll be do for a fill-up around a quarter of a tank, so be sure to ask Alexa how much oil you have left every couple of days.

With the Smart Oil Gauge linked to your amazon account, you can ask Alexa a variety of different questions regarding your tank status and much more!

What About Google Home?

If you’re an advocate for Google Home devices then you might be wondering about Google Home compatibility. The Smart Oil Gauge was once compatible with Google Home. However in May of 2023, Google discontinued conversational actions. So the Smart Oil Gauge is unfortunately no longer compatible with Google Home devices.

Managing Your Home Heating Oil

There isn’t a better combination than a Smart Oil Gauge with FuelSnap with Alexa integration. You’ll be able to know exactly how much oil is in your tank without having to walk down to the basement. You can simply just ask Alexa how many gallons you have left, are using and when you’ll need to order next!

Additionally by using FuelSnap, you can quickly shop for the best prices of heating oil through the Smart Oil Gauge app. FuelSnap allows you to shop for the best prices available to you and can let you order at the press of a button!

Happy Heating,

Hunter

Conserving Heating Oil with an Old Home

If you live in a home that’s on the older side, you probably dread getting your heating bill every winter. As you might know, older homes tend to have older windows and less insulation which will require more heating oil to keep your home at a warm temperature. In this article, I’ll be sharing some tips and tricks on how to conserve your heating oil in an old home while tracking your oil usage.

Areas to Focus On

There are a lot of older houses built in Connecticut. While this does sound appealing to some, it comes with a lot of downsides! For example, if the house was built in the 1800s, then it’ll likely still have windows that were made in the 1800s. These windows are not properly sealed and if it’s windy, the wind can blow papers off tables! This is also important to know because this can cause cold air to blow in which causes the warm air to blow out! This can cause your heating bills to be very expensive!

After talking with some friends and family members who have old homes, they’ve filled me in on some ways that you can save on heating oil and conserve your heating oil as well! But first, it’s important to know the areas you’ll need to focus on first.

  1. Heat Loss – Find out where the heat is escaping from
  2. Heat Generation – Keeping your burner in good condition and ensure it’s running efficiently
  3. Heat Setting – Monitoring your consumption and adjusting your thermostat as necessary
The above home appears to be renovated. However, before the renovations, this house was very much a money sink when it came to heating oil. Before getting the home renovated, this home likely had a lot of issues maintaining heat and keeping the house warm.

Heat Loss: Where’s the Heat Going?

You might take notice that your boiler or furnace could be working overtime. If this is the case, you probably have heat escaping from your home. Usually as warm air escapes, cold air will replace it. This will naturally lower the indoor air temperature of your home. Some key places to take a look for possible escape points would be the following:

  • Windows
  • Walls
  • Doors
  • Ducts

Windows

Single-pane windows will tend to create more appeal in a lot of older homes. But, they usually do very little in terms of keeping the heat in. Modern windows are normally two-pane with air pockets in between. This small pocket of air will allow as a sort of insulation to keep the heat in your home. If your home uses single-pane windows, you can apply a thin layer of plastic film to provide another seal. It’s easy to install and all you have to do is cut it to size and apply some double-sided tape to keep it steady. Once you’ve secured it, you can use a hair dryer to shrink the plastic wrap in place. If you do it properly, it won’t even be noticeable! This will ultimately make the home feel a lot more comfortable!

Sealing off drafty windows like in the above photo is a fantastic way to keep the heat in your home! This will also help reduce your total oil consumption!

Walls

Walls can also tend to be a major contributor to the loss of heat. Due to this, you should consider adding insulation to help you keep the heat in your home. Insulation that’s blown in is usually more cost-effective and can be subsidized through energy auditing from your state. However, the state must offer it. Once you’ve added the extra insulation, you should see a rapid decrease in heating oil usage almost immediately.

Doors

This might seem like a no-brainer, but because doors and always being opened and closed throughout the day, it is unlikely that the door is sealed perfectly shut. Due to this, you’ll often have a draft coming from your exterior doors. This is especially common on the bottom of the door. When it’s cold out, place your hand near the door’s base. If you can feel cold air, you should consider putting down a “door sweep” or “draft blocker”. Many types of these vary in degree of installation, difficulty, and effectiveness. The simplest options can usually be slid right under the door without the use of screws and will do a job of keeping out the cold.

Duct Work

This one might come as a big surprise for many. But the ductwork in your home is very important. A lot of old homes will tend to have “forced hot air” as their form of heating. With a setup like this, your basement furnace will heat air using a heat exchanger. Once the air is hot, the furnace will blow that hot air through the ducks throughout the house. Meanwhile, it will suck air in through the “return vents” throughout the home. Because the room ducts will bring in room-temperature air from the house, the furnace won’t have to heat the cold air from the outside.

But some basements can be VERY cold and unheated. As a result of this, usually, the air in the basement will be constantly cooling the ducts. This can make your furnace work extra hard because it will unintentionally be heating your basement. You can wrap the ducts in insulation to help keep the heat headed to its destination. It will also keep the return air from being cooled unnecessarily when it makes its return to the furnace. The insulation will also help seal any leaks in the ducks which will prevent the hot air from escaping and keep it inside the vents.

Heat Generation: Ensuring that Your Burner is in Good Condition

Your home’s boiler or furnace is the equivalent of a car engine. It produces heat for the home so that you can stay warm. Just like it’s important to change the oil on your car, getting your burner serviced is something that should happen regularly. Annual cleanings and tune-ups will help HVAC technicians notice any possible issues before they happen. Making sure that you stay ahead of the issues with your system will help ensure that your heat will stay on all winter and save you a lot more money in the future.

You should do a furnace tune-up at least every other year. But it is highly recommended to do one every year.

Getting a furnace tune-up done yearly will also help with fatal and dangerous issues. Such as a crack in your heat exchanger. This can cause deadly exhaust gases to enter your home. These fumes contain Carbon Monoxide which is very dangerous to inhale. If this happens, then it’s time you replace your furnace.

Usually, oil-fired furnaces are built to last for 20-30 years. However, if your system is much older than 20 years old, you should consider getting it replaced. Newer systems tend to be much more efficient, and quiet and generally output more heat than older systems. Getting a tank monitor like the Smart Oil Gauge will be able to help you collect data on your heating oil usage and level. It can help you calculate how much oil is being burned and can help you figure out how much a new system will save you in the long run.

This is an example of a new heating oil system. This new system will save you a significant amount of money and can usually be adjusted thanks to a programable thermostat!

Heat Setting: Monitoring your Consumption and Adjusting the Thermostat

Installing a Smart Oil Gauge is one of the best things that you can do to monitor your heating oil consumption and usage. The Smart Oil Gauge will show you daily, weekly, monthly, and yearly consumption and usage data. By keeping an eye on this information in an old home, you’ll be able to determine where you can improve your home’s heating capabilities. You can use the Smart Oil Gauge in conjunction with a programable thermostat to adjust your home temperature remotely! This will ultimately help lower your overall oil consumption.

With homes that have radiators and boilers, it will take a much longer time to reheat the home. What our Smart Oil Gauge data shows us is that leaving the temperature the same for the entire day will keep the usage of your oil fairly low. Especially if you have insulation in your home, this will make you burn less oil throughout the day because your insulation is not only keeping your house warm, but the temperature isn’t changing much at all either.

One of the best things that the Smart Oil Gauge offers is being able to analyze your savings between a new and an old furnace. You can download your data by logging onto the website and exporting it to a Microsoft Excel spreadsheet. You can do this however often you’d like, but if you do it between the usage of a new and old furnace system, you can compare the data side by side.

Determining your K-Factor

The K-Factor is basically how long your heating oil will last you in your heating oil system. To fully understand the math problem, there is another important factor to know. Degree days is a figure that is normally used to determine how much heat is needed to heat a home on a specific day. If we use a baseline of 65 degrees Fahrenheit and subtract the average outdoor temperature from 65, then we’ll get our total degree days.

For example, if the average temperature outside is 25 degrees Fahrenheit, then we’ll have to do the following equation 65 – 25 = 40-degree days. In Connecticut, we usually see an average of around 5,900 degree days over a full year.

Comparing Usage with an Old and New Furnace

With the use of exported data from a Smart Oil Gauge, you can determine your K-Factor from your old furnace by taking the average amount of oil burned throughout the year. This can depend on where you live to determine your degree days, but it can change depending on where you are in the United States.

With a new furnace, however, your K-Factor will likely increase. This means that you will end up using less oil per year when you would be ultimately using more on your old furnace. This could save you hundreds of dollars yearly and can be helpful to ensure that you are getting the best price for your heating oil!

The Smart Oil Gauge will record your heating oil usage by the hour. In the above photos, we compared a new furnace system to an older system and side by side, you can see a huge difference!

Conclusion: Older Homes and Heating Oil

The first question that you should probably ask yourself is where can you save the most money on heating oil? A new furnace would be the best way to go about saving money. But, it will normally cost you a couple of thousand dollars to be able to get one installed, and it might not even be right away. Due to this, there are a lot of DIY methods to prevent high oil consumption. You can get various things for your home such as plastic wrapping your drafty windows and getting draft stoppers for your doors!

You can also get a proper handle on your oil usage/consumption by installing a Smart Oil Gauge. This will be able to show you exactly how much heating oil you are burning and will help you optimize how much oil you can save. Getting a programmable thermostat on top of the Smart Oil Gauge will help you optimize your consumption and start saving a lot more oil!

After you’ve taken the necessary steps to ensure your home’s heat doesn’t escape, be sure to check out our FuelSnap page! FuelSnap will help you find local dealers in your area with the best prices available to you!

Happy Heating,

Hunter

How to Install your Smart Oil Gauge

While it might seem self-explanatory, ensuring that your Smart Oil Gauge is installed correctly is crucial. The installation process is a little bit different depending on your tank’s orientation, especially between Granby and Roth tanks. In this blog post, I’ll be covering the process of installation for your Smart Oil Gauge!

What You’ll Need

When it comes to installing the Smart Oil Gauge, you don’t need much. All you will need is a simple pipe wrench, pipe dope, and (if necessary) an adapter. We go over the specific types of adapters in this article here. Please note that the Smart Oil Gauge Duo cannot use standard adapters and will need specific adapters for the Duo. You can get all of the necessary items that you’ll need for installation on Amazon, Home Depot or Lowe’s.

With everything that you’ll need the install the gauge, the finished product will look like this. But don’t worry, I’ll be explaining what you’ll need to do to get to this point.

Installation on a Steel Tank

Installing the gauge on a steel tank is very easy. But, it’s very important to know that you MUST install the gauge onto a 2″ NPT fitting. If your fitting is smaller than that you will need an adapter. We have adapters for 1.25″ and 1.5″ NPT fittings that are for steel tanks. If you have a fitting that’s bigger than 2″ NPT, then you’ll need to find a smaller one for the installation. Or in the worst-case scenario, you won’t be able to install the gauge on your tank.

The first thing that you’re going to want to do is make sure that you have all your necessary material. This would include the Smart Oil Gauge, a pipe wrench and pipe dope. Once you have everything, simply apply a thin layer of pipe dope onto the bottom threads of the gauge. Then, you’ll want to hand-tighten it down as far as it can go. Once you hand-tighten it down all the way, finish it off with a pipe wrench. We have a video tutorial for this process right here.

If you’re using an adapter , then it’s important to know that you DON’T need to apply pipe dope on the bottom threads of the gauge. If you do, your gauge will either read inaccurately for full. Only apply pipe dope to the very bottom of the adapter where it threads into the tank.

Installation on a Roth Tank

There is one big difference between installing a steel oil tank compared to a Roth oil tank. When you install the gauge on a Roth tank, you must install it with a Roth adapter. If you have the Duo, you will need the Duo Roth Adapter. It’s a requirement to use the Roth adapter because, without it the gauge will always read as full. This is because the signal won’t be sent out properly and will bounce off the sides of the fitting.

This is the install process for the Standard Smart Oil Gauge’s Roth adapter installation.

Installation on a Roth tank is very easy. All you need is the gauge and the adapter. You DO NOT need a pipe wrench or pipe dope for this installation. All you have to do is simply screw the Smart Oil Gauge into the adapter, unscrew the black fitting cap on the tank, and place the Smart Oil Gauge on the tank fitting here it will then be able to read to contents of the tank. You can view our video tutorial for this installation on our YouTube Channel.

These are the instructions for the Roth Duo adapters. Pretty similar to the standard Roth adapter instructions, but with a few more bells and whistles.

Installation on a Non-Traditional Tank

Now, installation on non-traditional tanks can be a little tricky. These tanks normally are long cylindrical, cube, or rectangular tanks. But while some tanks that are not in the traditional style can have the gauges installed pretty easily, it’s important to know that others can’t. These tanks must have a 2″ NPT fitting so that you can install the gauge. Some of these tanks either do or don’t have a fitting of that size. But some do, and if you do have one of these style of tanks, it’s important to see what size your fittings are.

If you have a tank fitting that is more than 2″, then you will likely not be able to install the Smart Oil Gauge onto your tank. The reason for that being is that any adapter that the gauge would need to work properly MUST come from us. The reason for that is that the adapters that we make are specifically designed for the Smart Oil Gauge. These adapters take into the sensor’s cone-like signal that will allow the gauge to take a proper reading. Other adapters, do not take that into account.

It’s also important to know that with these non-traditional tanks, that you CANNOT install the gauge onto a raised fitting, t-pipe, or extension pipe. The reason for this is because with these types of installation, the gauge can’t send out the signal properly. The gauge will always read as full because the signal isn’t being sent out properly. If you install the gauge like this, you will need to move it to a different fitting.

Set Up Your Gauge Before Installing onto the Tank

Before you go ahead and install the gauge onto the tank, make sure that you set up the Smart Oil Gauge. While this is not mandatory, it definitely makes the process of installation go by a lot easier. By setting up the gauge, off of the tank before it’s installed, you don’t have to worry about awkwardly standing over the tank while you try to get the gauge configured.

If you wish to install the gauge before setting it up, then that’s completely fine. However, please be aware that you will have to set it up at the tank location. This can be especially annoying if you hired someone to install the gauge and they didn’t even set it up!

Conclusion

Depending on what type of tank you have, you might have a different way to install the gauge onto the tank. Which is completely fine! So long as you follow the steps and process in each of our video tutorials and those in the article, you’ll be able to get the gauge installed without issue!

When installing, just make sure that you have all of the necessary tools that you’ll need for the process! Also, make sure that your gauge has been properly set up and configured to your account so that you can start getting accurate readings once the gauge is installed onto the tank!

Happy Heating,

Hunter

How Long Will a Tank of Heating Oil Last?

It’s currently July 2024, which means that we’re starting to wind down on heating oil usage. Even if you aren’t burning oil, it’s still a good idea to plan for when you need to order oil. It’s also important to know how long a filled tank will last you, even in the summer. Especially if you use heating oil for hot water, in which you’ll always be thinking about heating oil! In this blog post, I’ll be covering how long a full tank of oil will last you!

Tank Size

The most common and obvious factor when it comes to how long a full tank will last you is based on your tank size. Typically, the most common tank size used today is 275-gallon tanks. Despite having a tank capacity of 275 gallons, these takes will usually have a maximum capacity of 250-260 gallons. This is because oil dealers will normally leave the top couple of inches free for airflow. Oil dealers will do this to prevent overflow and risk of leaks. Aside from 275-gallon tanks, 330-gallon tanks are the next most common size.

While not uncommon, sometimes homeowners will have a ‘twin tank’ system. This is when two tanks (usually of the same size) are linked together. This effectively doubles the capacity for how much oil you can store and burn before needing to get more. These tanks will usually have a crossover pipe on the bottom of the two tanks that connect the two which will allow for equalization.

If you have an underground tank, you’ll usually have about 500 gallons as your capacity. However, sometimes, they can get as big as 1000 gallons or even 2000 gallons! These tank setups are pretty rare because they are normally removed after 30 years or so when these tanks tend to start eroding. If you are deciding to remove your underground tank, we cover everything you need to know about that here.

The most common tank sizes will typically look like this. They will have an ovular shape to them and will either be laying on their sides or on the bottom.

House Size Will Affect Usage

After you’ve gotten your tank size, you’ll want to know how much oil your home will require daily. This will then help us determine how long a full tank of heating oil will last you. The following factors will be your biggest impactors on how much heating oil you burn daily:

  • House Size: With a home that’s 1500 square feet, you might see yourself burning around 500 gallons yearly. However, a 3500-square-foot home will probably use well over 1500 gallons per year.
  • Energy Efficiency in your Home: Usually a 2500 square foot home that’s well insulated will only use an average of 600 gallons of oil per year. However, a house of the same size that is poorly insulated can use upwards of 1200 gallons per year! Ensuring that you have a well-insulated home is important to keep your home warm and your usage low!
  • Heating System Age: If your heating oil system is well maintained, then it will last longer than most other heating oil systems! Well-maintained systems can last for 30 years or longer! While this does sound great, technology will continue to improve as the years go on to make these systems more efficient. For example, upgrading to a new oil-fired heating system can ultimately reduce your heating costs by up to 30%.
  • Interior and Exterior Temperature: Turning down the temperature of your thermostat will reduce the amount of heating oil that you’re burning. But, that isn’t the only contributing factor when it comes to burning oil. The exterior temperature plays a huge role in burning oil. The temperature outside will ultimately determine how much oil you’re burning. On a 10-degree day, you might end up using anywhere from 8-12 gallons! But on a day that’s 30 degrees, you’ll probably only use about 5-7 gallons of heating oil.

Daily Heating Oil Usage

After finding out your tank size, you can use the below chart to determine how much heating oil you’ll use daily. Using this, you can estimate how long a tank of heating oil is going to last you.

But, keep in mind that you don’t want to wait until your tank is empty! Always be sure to order heating oil when your tank is below 1/4! Or as we say it, “Order at a Quarter”!

On average, a home that’s 2500 square feet will use around 4-6 gallons daily on a 30 degree winter day.

How Long Until You Need to Order Oil?

The point at which you’ll need to reorder oil will depend on the size of your tank and your consumption. Just like with your car, it’s important to not let your tank run empty. This will cause damage to your heating oil system and which will cause your burner to shut down. This can also cause sludge to get sucked into the feedlines which will clog your system.

As mentioned previously, you should order oil when your tank is 1/4 full.

Looking at this chart gives you a good way to gauge when you should order heating out! But be aware this will only give you an estimation of how much oil is actually in your tank. So, it’s important to not let the level get low enough to risk a runout.

On a tank that’s 275 gallons, the 1/4 mark is roughly 68 gallons. Because a 275-gallon tank can only hold a maximum capacity of 250-260 gallons when it’s full, this will usually mean that you’ll have 182 gallons of oil to burn through before you should order more. You can use the above table to determine your average heating oil usage. By doing a little bit of math, you can get the total number of usable gallons. For example:

  • Size of Home: 2500 Square Feet
  • Average Temperature Since Previous Fill Up: 30 Degrees Fahrenheit
  • Average Daily Usage (30 Degrees Outside): 5.2 Gallons Per Day
  • Tank Capacity: 275 Gallons (True Capacity 250 Gallons)
  • Point of Reorder: 1/4 Tank or 68 Gallons
  • Gallons Before Next Reorder: 250-68 = 182 gallons
  • Days Between Fills: 182/5.2 gallons/day = 35 Days

When the outdoor temperature is around 30 degrees Fahrenheit, a 275-gallon tank that’s heating a 2500-square-foot home, will last around 35 days between fills!

When Should You Check Your Healing Oil Tank to Order Oil?

It’s important to check your oil intake often so that you don’t wake up to a cold house in the middle of the night during the winter (trust me it’s not fun). If you did run out of heating oil, then it is best to take a look at this article here for steps on what to do.

Usually with an old-fashioned float gauge, we recommend checking the tank at least once a week or at the very least, every two weeks. You can periodically set a reminder on your phone to alert you when it’s time to go down to check the tank every so often.

However, if you have a Smart Oil Gauge, then you can check your tank whenever and wherever! With the use of the Smart Oil Gauge, you can monitor your tank level and usage just by having the app installed! The app keeps track of usage data and your oil level so you’ll have everything you need in the palm of your hand!

But, if you’re still new to heating oil and are curious about how much heating oil you might be burning, take a look at the below chart to gauge your expected use for the winter!

The above chart shows how many gallons you should expect to use in a CT home. But be aware that the outside temperature and your home’s energy efficiency will change your results to either side of the graph during the winter season.

Conclusion

When your tank reaches 1/4 or below, it’s time to order oil. To check for the lowest prices available, check our FuelSnap website! This will give you the ability to shop around using local dealers in your area and get the lowest price possible for you! You’re able to choose exactly how many gallons you want and decide between local dealers! But be sure to check your tank frequently so you know when it’s time to order!

The amount of oil that you burn will depend on your home size as well as how well-insulated your home is. If your home is very well insulated then you will see yourself burning less oil in the long term. Meanwhile, if your home is not well insulated you will end up burning more oil in the long term.

Tank size is another important factor as it will also determine how much oil you will need to burn before you need to get a fill-up. If you have a 275-gallon tank, you’ll often have to burn through 182 gallons before it’s time for a fill-up.

Happy Heating!

Hunter

Budgeting with Heating Oil

Summer is here! But with the warm and sunny weather, I bet heating oil is the last thing on your mind. However, just because we’re out of the heating oil season doesn’t mean that you shouldn’t start preparing for next season! With that comes a budgeting plan!

Prices for heating oil have been fluctuating a lot. During the winter, prices can get as low as $3.30 a gallon in CT and $3.40 a gallon in NY. Even if prices have been going down, it’s not a bad idea to start budgeting.

While this is a bit larger in scale, it still shows that while heating oil is starting to go down in price, it spiked in price in early 2022 due to Russia’s invasion of Ukraine. But, it has been on a steady decline since.

How Much Oil Will You Use Annually?

I’ve touched on this topic in particular on several occasions. The short and sweet of it is, it depends on your daily usage. The bigger and older your house is will usually determine how much oil you should be using. If your home isn’t well insulated, then you will naturally burn more oil. Additionally, if your boiler is heating oil-based, expect to use an extra 100 gallons per year.

Will all of that in mind, most average homes will use about 900 gallons of heating oil per year. If you are interested in finding out how much oil you are burning daily, weekly, monthly, or yearly, I recommend getting a Smart Oil Gauge to track your usage. The alternative to that is collecting your delivery tickets and calculating an average based on those

In the above chart, you’ll see what the average home in CT will burn based on their home’s square footage.

How Much Should You Budget on Heating Oil?

Over the past couple of years, heating oil prices have seen a lot of fluctuation. Between COVID-19 bringing it down to incredibly low prices and Russia invading Ukraine in 2022, oil prices have not been consistent. But with that being said, heating oil prices per gallon rarely get above $4. For $2.50 per gallon, the average home will be able to spend $2,250 a year. With a price like this, it’s wise to save around $450 a month for heating oil.

As we leave the cold early months behind, we must prepare for 2024’s heating season. If the prices for heating oil continue to go down, then putting money aside for heating oil is a smart decision! This will give you the ability to save the remainder of that money on anything else that you might need such as groceries and gasoline. If the prices continue to go down, then the total annual cost of heating will decrease! However, if the prices decide to go back up, then this can be problematic as it will effectively cost more to heat with heating oil.

During the winter months, instead of budgeting around $450, expect to budget $950 a month due to increased usage.

Another example of how much heating oil prices have changed over the past year.

Start Saving Now to be Prepared for Winter

One of the best ways to be on top of heating oil budgeting is to start saving now! Heating oil prices have been fluctuating for some time and saving now will help you in the long run. Some heating oil companies might offer a “Budget Plan” to help you save. But in reality, you can do this yourself by putting a little bit of money aside each pay day to put into an “oil fund”.

You can start by estimating how much you spend a year based on your previous deliveries. You can do this by checking previous bank statements or delivery slips. Add them all up and divide that number by 10-12 and you’ll come up with a total amount that you need to save every month.

It’s never too late to start saving money and budgeting. While we won’t know what the price of heating oil is come winter, it’s better to be prepared when the time comes so that you’ll have some money set aside. If you start saving now and prices continue to go down, then you’ll be way ahead of the game once the cold weather hits.

Happy Heating,

Hunter

How Much Heating Oil Will You Burn During the Summer?

Summer is just around the corner! This means it’s the perfect time to discuss heating oil during the summer. While it’s probably the last thing that comes to your mind during the summer, it’s still something that should be on your radar. This is because some houses will tend to use heating for more than just heat. Hot water is commonly used alongside heat or by itself. In this article, I’ll be covering how much oil you should expect to be burning during the summertime.

Only Burning Hot Water

The four main sources of heat in the United States are natural gas, propane, electricity, and heating oil. This can also be said for hot water. One thing that all of these forms of heat have in common is that they can all heat water in some shape or form. However, just because your home uses one fuel in particular doesn’t mean that it uses the same fuel to heat water. Some homes will often tend to use heating oil for their furnace (heat) and a propane system for hot water. But, it’s typically more common for most homes to use one fuel source for both heat and hot water.

If your home relies on heating oil for just hot water production, then usually don’t have pay too close attention to your heating oil level come mid-May. But sometimes, if it gets cold at night, feel free to turn your heat on!

Once late September comes around, you can usually start turning your heating oil systems back online. This means that come the cool fall weather, you’ll have to start paying attention to your oil level to make sure that you don’t run out. But otherwise, during the summer you’ll be using minimal heating oil.

This graph shows what it’s like to use hot water only over the course of a year. As shown above, you can see that throughout the summer there was little to no usage of heating out!

Using Heating Oil for Heat and Hot Water

If your home has a water heater or oil-fired furnace, you should monitor your heating oil usage year-round. For this, I highly recommend picking up a Smart Oil Gauge. This will give you an extra layer of protection from running out. With the gauge configured for your tank, size, it will be able to accurately pick up usage data and tell you how much oil is in your tank. You’ll even bet an alert notifying you when your tank is running low! If you are interested in more information on the Smart Oil Gauge, check out this article here, where we cover everything you need to know!

Oil-fired hot water heaters such as the one shown above, will typically use about a half a gallon and one gallons worth of heating oil on a daily basis. Longer and more frequent showers will definitely impact this average.

Now, in the instance that you have one heating system for both hot water and heat, you’ll use significantly more oil than someone who is using their system just for hot water. But during the summer, you’ll be using a lot less oil than you’re accustomed to. The average home can use anywhere from half a gallon to a full gallon of heating oil on hot water alone! But, if you take consistent hot showers and/or have multiple people living in your home, you’ll probably end up using more oil than that on the daily.

Based on the above data, you can see that this tank is using far more oil than the previous graph. That’s because this system uses heating oil for both heat and hot water. During the winter, they might be averaging 4-6 gallons of oil a day!

When Should You Order Heating Oil?

Regardless of what time of year it is, we recommend ordering oil once your tank reaches 1/4 full. This will typically ensure that you have plenty of time before your next delivery arrives and before you run out. You can compare local prices using our FuelSnap website.

You also shouldn’t let your tank get too low. If this happens, your feed lines could suck up sludge which can clog and damage your feed lines and oil system. When your tank is low on oil, be sure to reach out to your local dealer or order from FuelSnap to ensure that you don’t run out of oil. Make sure that you order from reputable dealers and other local suppliers in your area to make sure that you have oil all year round!

Happy Heating,

Hunter

Kerosene Heating: A Guide for Homeowners

You right remember learning about John D. Rockefeller and his empire of oil in school. One of his major selling points for oil back in the day was kerosene. It’s derived from crude oil and gained a lot of popularity as light fixture fuel and became available across the country.

In the present day, it’s mainly used for jet fuel and home heating. In this guide, I’ll be breaking down what you need to know about kerosene heating in the modern world. I’ll be covering the basics and anything important that you should know! Let’s get started!

Kerosene: What is it?

Kerosene is a type of low-viscosity heating oil. It’s a clear flammable liquid that is based on petroleum. Its flashpoint is usually anywhere between 100-150 degrees Fahrenheit. It will also freeze (meaning turns into a gel) once the temperature reaches around -40 degrees Fahrenheit. Unlike heating oil which tends to gel at around 16 degrees Fahrenheit, kerosene can be stored in much colder environments.

This is an example of the type of lamps that kerosene powers. While they are not as common anymore, they were very popular in the 1800s

What Use Does Kerosene Have?

Originally used in the 1800s, it’s a fuel source that powers lighting fixtures. It was incredibly popular, but it eventually dropped in price as a result of the rise of heating oil. Electric heating also played a role in kerosene’s downfall from the top as electric heating became more common in the US. The inclusion of electric lamps, which don’t need to refuel oil made kerosene deliveries almost non-existent.

At present, kerosene is mostly used as a fuel source for home heating systems. It’s also a very important ingredient in jet fuel that helps aircraft fly. It can also be added to heating oil as an additive that allows you to mix it into your heating oil.

How’s Kerosene Different from other Forms of Heating Oil?

While kerosene is very similar to heating oil, you can’t change between the two. There are quite a few important differences between the two. I cover them a bit more in-depth in this post. One of the biggest differences is that kerosene has a lower flash point than heating oil. The flash point for kerosene usually starts at around 100 degrees Fahrenheit which makes it more hazardous than heating oil. Heating oil must first be atomized and then heated up to 140 degrees Fahrenheit for it to ignite.

However, one of the benefits of kerosene is that it has a lower freeze point than heating oil. It will usually begin to gel up around -40 degrees Fahrenheit! Unlike heating oil that will start to gel up at 16 degrees Fahrenheit. This makes it much more suitable for colder environments. In places where temperatures will usually be significantly below freezing, kerosene is a must-use.

It’s important that when storing Kerosene, you must use only blue containers. This safety precaution will help distinguish between gasoline (usually stored in red cans) and diesel fuel (stored in yellow cans). Diesel can be used when in a pinch if you need to get some oil in your tank after it runs empty.

Can You Add Kerosene into your Heating Oil Tank?

There is a very thin line for what you can and can’t do with kerosene heating. While it’s similar enough to be mixed in and burned with heating oil, it’s not similar enough to replace heating oil completely. It’s typically ok to add kerosene into a heating oil tank that’s full. But it’s NOT ok to fill an empty heating oil tank with kerosene for a long period. Your heating oil equipment can become damaged permanently if it burns kerosene in the long term.

However, some technicians recommend adding small amounts of kerosene to your tank as a periodic cleanser. Think of it like a pallet cleanser when you go to a fancy restaurant. But, you can also use other types of additives to do this as well.

But in the instance that you run out of heating oil, DO NOT put kerosene in your tank. In this instance, run to the gas station and grab 5-10 gallons of diesel fuel. This will hold you over until your next delivery of heating oil comes. We go over this in more depth in this article here.

Can You Switch from Heating Oil to Kerosene?

If you wish to make the switch to kerosene from heating oil, then you will need to have a complete system overhaul. This will include swapping out all of your system parts that are for heating oil, to kerosene-specific parts. If you live in extremely cold climates like Alaska, then this is highly recommended. It’s also far more suitable for colder weather environments due to its low flash point.

The biggest thing to be aware of, however, is that kerosene is not as readily available as heating oil. That is why making the switch from heating oil is so uncommon, especially in the Northeast. It is very hard to come by and even if it’s cheaper per gallon than heating oil, it’s much harder to find. It is better as an additive that you can put into your tank to prevent it from gelling in the colder months of the year.

Happy Heating,

Hunter

Which is Better: The Float Gauge or The Smart Oil Gauge

Heating Oil Gauges have improved vastly over the past few years. With the inclusion of the Smart Oil Gauge, getting an accurate reading is easier than ever! Your heating oil tank is now at the tip of your finger! However, that begs the question. What about your float gauge? While the float gauge will still see a lot of use today, can it contend with the accuracy of the Smart Oil Gauge? I’ll be covering that in this article!

The Float Gauge

The Float Gauge is easily one of the most popular ways to keep track of your tank’s oil level. It operates off of a metal arm with a cork bobber at the end of it. The bobber on the arm connects to a plastic cylinder with a little plastic disk. The plastic cylinder and the interior disk work in conjunction with each other. The plastic cylinder is marked to determine what the oil level is with the help of the bobber. Depending on what your oil level will affect what the gauge will be reading and where the bobber will be.

As you’ll see in this picture, the float gauge is positioned in the more open end of the tank so that the bobber can float freely.

One important thing for using a float gauge is to know your tank size. That will help understand roughly how many gallons you have in your oil tank. Considering most tanks are either 275-gallon or 330-gallon tanks, you’ll likely have to work with one of those. But on the off chance that you don’t have a tank of that size be sure that you know what size tank you have so that you can understand your reading accordingly.

The Smart Oil Gauge

The Smart Oil Gauge is a wireless tank sensor that connects to your WIFI to be able to transmit data to our servers. Once you successfully set up the gauge, simply plug in your tank information and install it onto the tank! The gauge will be able to read for your tank size in particular. If you don’t see your tank listed in the available tank sizes, feel free to reach out to us and we’ll provide you with a custom tank size!

It’s important that with the Smart Oil Gauge, you have it connected to a stable internet connection. If the gauge has a strong signal that it can continue to connect to, then the Smart Oil Gauge will be able to upload to our servers regularly without issues.

The Smart Oil Gauge should look like this installed onto your tank. Be sure to install it using a pipe wrench and not channel locks! Once the gauge is installed onto the tank, it should be able to read down below into the tank if the sensor is pointed directly downward!

The Smart Oil Gauge comes in several different models. The two most prevalent models are the standard Smart Oil Gauge and the Smart Oil Gauge Duo. The standard gauge has an operating distance of 8″-72″ because of the 8″ blind spot. But the Duo doesn’t have that 8″ blind spot because of its dual-sensor functionality. Due to that, the Duo has an operating range of 0″-72″. We discuss the differences between the Duo and Standard gauges in-depth in this article here if you’d like to learn more!

Comparing the Two Gauges

When comparing the float gauge and the Smart Oil Gauge, it’s important to know what they can and cannot do. You can have both gauges installed onto the tank at the same time to get the best of both worlds. However, if you want to only use one of them, then it’s important to know their differences.

For using the Smart Oil Gauge, it’s important to know what size tank you have. This is because the gauge needs to know what tank size it’s reading for so that it can function correctly. If you have a 275-gallon horizontal tank, it’s important to configure the gauge for that tank size so it reads accurately. With the float gauge, however, it won’t be able to tell what tank it’s being installed to. So it’s up to you to figure out how many gallons of oil are in your tank based on what the float is reading. The float also cannot accommodate the curvature of a tank. Meaning that once you reach a certain point, the gauge might be reading less oil faster.

With the float gauge, as time goes on, oil and sludge will coat the bobber. This can cause the float gauge to become less accurate as time goes on. The bobber will then become bogged down with the oil and sludge causing the gauge itself to read less oil, or even be stuck on the bottom of the tank. The bobbers are sometimes hard to clean, but you can always replace them. However with the Smart Oil Gauge, because it has no arm and bobber, the gauge will very rarely have oil on the sensor.

This is what the Smart Oil Gauge and a Float Gauge will look like side by side. They have vastly different designs, but can often be used in conjunction with each other.

Sometimes when you receive a delivery of oil, it can splash up around the sensor. Although that is rare, you can clean it off easily. Instead, the gauge uses an ultrasonic sensor that doesn’t require it to have a float gauge-style arm. The gauge will simply send a signal down to the oil level, that will then bounce back up to the sensor.

Finally, the Smart Oil Gauge is something that you can access anywhere from your phone. As long as the gauge has a stable WIFI connection, it can connect and upload to our servers. You’ll then be able to check your phone to get your tank’s reading from anywhere! However, with the float gauge, you’ll need to go down to the tank location to view the oil level in the tank.

Which Gauge Should You Use?

Whichever gauge you decide to use is completely up to you. You are more than welcome to use both! Most of our clients use both the Smart Oil Gauge alongside their float gauge! This gives them the best of both worlds!

But, in terms of accuracy, the Smart Oil Gauge is the more accurate gauge. It accounts for your tank’s curvature and uses an ultrasonic sensor to send a signal down to the oil level where it’s able to give you a more accurate reading based on your tank size!

Over time, the Smart Oil Gauge will even be able to maintain its accuracy! It won’t get bogged down and covered in sludge and oil, and will continue to read accurately due to no additional parts that go into the tank!

Happy Heating,

Hunter

How to Setup your Smart Oil Gauge

Setting up your Smart Oil Gauge is very important for its functionality. Without making sure that the gauge properly connects to the internet, it won’t communicate with our servers or the app. For your gauge to be able to work properly, you’ll need to make sure that the gauge is set. In this blog post, I’ll cover all the ways you can make sure that your gauge is set up properly!

The Smart Configuration Method

The first method that you’ll likely try is the “Smart Config” method. You can find this method by going onto the Smart Oil Gauge App and clicking on “connect sensor”. Upon clicking on this option, you’ll see that this method is asking for your WIFI network password. This is the WIFI password for the network that your phone is currently connected to. It’s important to note that when doing this method, whichever network that your phone is connected to is the network the gauge will try to connect to. So be sure that your phone is on the network that you want to connect the gauge to.

Once you’ve clicked on “connect sensor”, be sure to type in your WIFI network password and select continue. On this next screen, you’ll see a little animation that looks kind of like Mickey Mouse’s hand. This is demonstrating how to press the button on the gauge. The tall-thin black button that we’re referring to is located on the top right of the top board. Press the button twice and the gauge should start blinking twice a second, then press the continue button.

This is what the Smart Config method looks like from the quick start guide. It gives a brief explanation of how to get the gauge connected and shows the steps required.

The app will then go to another screen where it will say “Beginning configuration process, please wait”. Simply wait for the gauge to connect to your WIFI and when the process is done, it should say “Config Process Complete”. It will then take you to another screen where you’ll be able to fill out all the information that you need on your tank! This will include tank size, upload interval, and the tank’s name.

If the app says “Configuration Failed” then try seeing if you can verify the WIFI network password to make sure that you’re using the correct password. If you are, try rebooting the router and trying again. The process should be able to be successful after rebooting the router. If it still fails, try the below processes and see if they work!

The Alternate Configuration Process

This process is a little bit different from the Smart Config process. Unlike the smart config process that takes you through the Smart Oil Gauge app, this process will take you through your WIFI settings on your phone. With the Smart Config process, the process is identical for IOS and Android devices. However, the alternate process is slightly different depending on what type of device you use. I will be covering those differences here.

The first thing that you’ll need to do is go to your phone’s WIFI settings. Once you’ve made it to the WIFI settings, make sure that the gauge is turned on. Then, press and hold on to the tall-thin black button once for two seconds. Try counting one-one thousand, two-one thousand before letting go. I’ve often found that this will help you get exactly the amount of button presses that you’ll need.

This is the guide to the alternate setup process. This can be found on either the troubleshooting guide or the quick start guide depending on your model of Smart Oil Gauge.

Once you’ve done that, the gauge should start flashing once per second and you will see a network pop-up in your WIFI settings that says “CCF######”. The numbers will depend on your gauge’s serial number but the network popping up is the same. This is where you will need to connect to the network on your phone. The password when attempting to connect is smartoil.

Now, after typing in the password, the process might be different depending on your device. If you are on an IOS device, the gauge should take you right to the login screen. However, if you have an Android device, it will say “connected without internet”. In that instance, you will need to go to your web browser and type in the IP address. In the search bar, type in 192.168.4.1, and your phone will open up to the login screen.

Once on the login screen, you should see your WIFI network in a list of other networks in purple. Make sure that you select your WIFI network so that it can autofill the SSID box. Then, be sure to type in your WIFI network password and email address so that the gauge can send you a registration email. Then, hit the save button and check your email for the registration email!

The WPS Method

The final method that you can try is the WPS method. Now, this method is usually a last resort because it’ll only work if your WIFI router has a WPS button. If your router doesn’t have a WPS button, then you will likely not be able to do this process. The WPS button usually looks like either a globe, lock, or two arrows chasing each other but it might even just say WPS on the button.

The WPS button can often be found on either the front or back of your router like in the above photo.

The first thing that you have to do is press the WPS button on your router and the router should start flashing. Once you’ve done that, press and hold on the gauge’s configure button once for three seconds (one-one thousand, two-one thousand, three-one thousand) and let go. The gauge should then start flashing three times a second before connecting to your router.

After successfully going through the WPS configuration process, simply go on your Smart Oil Gauge app and refresh the page and you should see the gauge listed there on the app!

Gauge Bandwidth Compatibility

While most devices nowadays are compatible with 5ghz WIFI connections, the Smart Oil Gauge is not. Now, you might be wondering why we had gone with 2.4ghz rather than 5ghz. Well, the answer is very simple. While 5ghz is certainly faster than 2.4ghz, it doesn’t reach as far. That’s why 5ghz mostly finds use in streaming and gaming because those high-performance tasks require a faster speed to function properly.

Now with 2.4ghz bandwidths, they tend to reach farther than 5ghz. Most of the time, your oil tank is not going to be right under the router. It’ll usually be farther away in the basement or outdoors. For that reason, we chose 2.4ghz to provide the gauge with a strong signal that reaches farther than 5ghz networks.

This is a perfect example of how 2.4ghz and 5ghz work on your network. In the above photo, you can see that streaming and gaming take place within the 5ghz band. While everything else will be in the 2.4ghz band.

If your network shares both 2.4ghz and 5ghz, we recommend you open up a separate 2.4ghz-only network for the Smart Oil Gauge. This will give the gauge a solid connection to connect to and will make sure that the gauge doesn’t disconnect if it switches to 5ghz. If you can’t open up a separate 2.4ghz-only network for the gauge to connect to, then I would recommend getting a WIFI range extender. This will give the gauge another access point to connect to the internet with, as well as being able to split the 2.4ghz and 5ghz bandwidths.

We recommend the following extenders, this TP-Link extender is a 2.4ghz-only extender, meaning that it will only extend a 2.4ghz signal. There is also this NETGEAR extender, which is a dual-band extender. This means that it will be able to extend both 2.4ghz and 5ghz bands separately. I have had some personal experience with the NETGEAR extender and never had any issues with it when I used it!

Conclusion

Making sure that you connect your Smart Oil Gauge to the internet is very important for its functionality. The device will need a stable 2.4 GHz internet connection for it to function on the network properly. We’ve outlined everything that you’ll need to know above! Getting the gauge online will ensure that it’s able to read and upload without issue.

If you’ve gone through all of these methods and have still yet to get the gauge online, then do not panic, our support team is more than willing to help! You can reach us at 203-456-1499 option 3, Monday through Friday from 8 am-5 pm EST. But when you call, just make sure you have your WIFI password, Gauge Serial Number, and account email address all handy to make the process go smoother!

Happy Heating,

Hunter